
Most Dyson suction drops start with a small clog or a dirty seal, not a broken motor. If your vacuum feels weaker, you can bring back a lot of that punch with a few careful fixes. You’ll empty the bin the right way, wash the filters, clear hidden blockages, and check the brush bar and cyclone parts. Then you’ll reassemble it with less guesswork and test what changed, because the answer is often hiding in plain sight.
Empty the Dyson Bin the Right Way
To keep your Dyson working its best, start by emptying the bin before it reaches the MAX fill line, since a packed bin can quickly choke airflow and make suction fade.
You’ll feel more in control when you treat the bin like a fuel gauge, not a trash can. Hold the unit over a bin, press the release, and let debris drop cleanly. If dust clings inside, tap the sides gently so it all comes free.
Check the bin capacity often, especially after bigger messes, because overfilling can lead to suction loss that sneaks up fast. Then wipe the clear chamber with a dry cloth so you can see when it’s ready again.
Small habits like this help your machine stay strong, and they help you stay one step ahead.
Wash Dyson Filters and Let Them Dry
Once you’ve emptied the bin, take out the filters and rinse them under cold water only until the water runs clear. Don’t use detergent, since it can harm the filter material and hurt performance.
Then let the filters air dry for at least 24 hours in a spot with good airflow before you put them back.
Remove And Rinse Filters
Regular filter washing is one of the easiest ways to keep your Dyson working like it should, and it doesn’t take much time once you get the rhythm.
Use these filter access tips first: open the filter cover, pull the filter out gently, and keep a towel nearby so the mess stays in one place.
Then follow the rinse technique basics with cold water only. Run water over the outside until it starts coming clear, and turn the filter upside down to shake loose hidden grit.
If you have a pre-filter, squeeze and twist it with both hands. If you have a post-filter, tap and shake it instead.
You’re part of the same tidy crew now, so take your time and rinse every section well.
Air Dry Completely
After you’ve washed the filter, the real magic is in the drying, because a damp filter can hurt suction and leave your Dyson working harder than it should. You belong to the group that keeps their vacuum running like new, and that starts with proper drying. Place the filter in a warm, open spot with airflow drying around it. Don’t use heat, since that can warp the material.
| Do | Don’t |
|---|---|
| Set it upright | Seal it in a cupboard |
| Let air move freely | Rush it back in |
| Wait 24 hours | Use a hair dryer |
If you have two filters, swap in the clean spare while the other dries. That way, your cleaning routine stays easy, and your machine feels ready when you are.
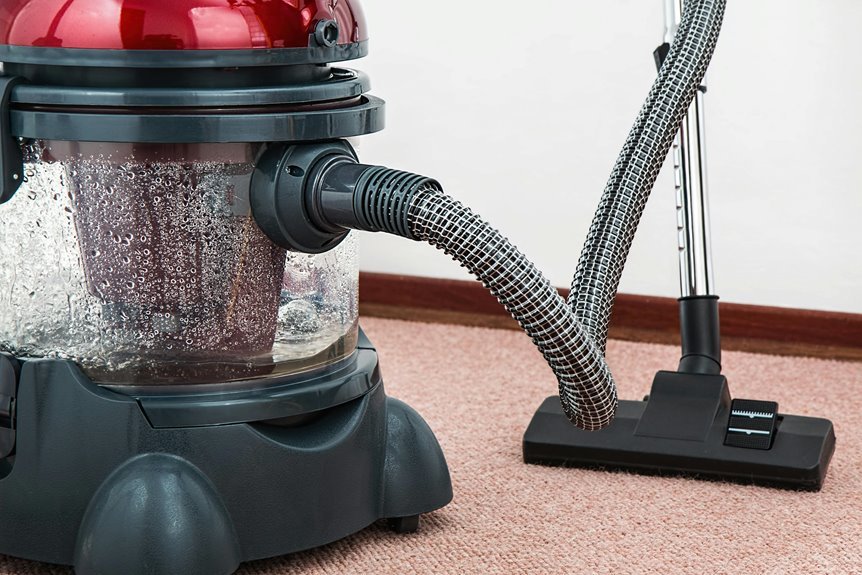
Clear Clogs From the Hose and Wand
If your Dyson has suddenly lost suction, the hose or wand may be packed with hidden debris, and that can feel frustrating fast.
You’re not alone, and this fix is usually simple. First, unplug the vacuum and remove the hose, then stretch it out so you can see both ends. Shine a light through it to spot a hose blockage. If you find one, use a long, flexible tool or a broom handle to ease it out gently.
Next, check the wand airflow by holding the wand up to light and looking for stuck dust or lint. Tap it lightly and clear anything loose. Then reconnect each piece firmly.
When air moves freely again, your Dyson can get back to the steady pick up you count on every day.
Check the Brush Bar for Debris
While you’ve already checked the hose and wand, the brush bar can still be the sneaky spot where hair, string, and grit like to wrap themselves into a messy little knot. You’re not alone if yours looks a bit crowded.
First, switch off the vacuum and turn it over. Then look closely at the motor brush and do a careful bristle inspection. Pull away any hair with your fingers or scissors, but work slowly so you don’t nick the bristles.
Next, spin the bar by hand to make sure it moves freely. If it feels stiff, clear out more debris from the ends and around the housing.
Finally, wipe the area with a dry cloth and recheck it before you snap the head back on.
Wipe the Cyclone and Seals
A quick wipe of the cyclone and seals can make a bigger difference than you’d think, especially when your Dyson’s been working hard and the dust just keeps sneaking back in. With a soft, dry cloth, give the cyclone wipe a gentle pass around the edges and inner surfaces. You’re not scrubbing a pan here. That careful touch keeps the finish safe and the airflow happier.
| Spot | What you do | Why it helps |
|---|---|---|
| Cyclone rim | Wipe gently | Cuts dust buildup |
| Seal ring | Check and clean | Supports seal maintenance |
| Crevices | Use a cloth corner | Reaches trapped grit |
| Base edge | Remove fine dust | Helps airflow feel steady |
| Join points | Inspect closely | Keeps parts fitting snug |
When you take a minute for this, you’re keeping your machine in the same clean, capable crew.
Clean the Dyson Head and Attachments
You can start by pulling away any hair, dust, and lint that wrap around the Dyson head, since buildup can slow the brush roll fast.
Then wipe the attachment tools with a microfiber cloth so loose dirt doesn’t get pushed deeper into the parts.
If an attachment still looks grimy, wash it gently the right way and let it dry fully before you use it again.
Remove Hair and Debris
Hair and dust can sneak into your Dyson head fast, but getting them out is easier than it looks.
First, switch off the vacuum and check the brush bar for pet hair buildup. Use your fingers or scissors to lift strands away, then pull out lint and crumbs from the edges.
Next, look inside the head and attachments for hidden debris cleanup, especially around corners, wheels, and seams. A soft brush or dry cloth helps you reach tight spots without scratching anything.
If you spot wrapped hair, turn the part slowly so you can free it without forcing it. Then wipe the outside so the whole piece feels fresh again.
When you do this often, your Dyson stays smoother, smells better, and feels ready to help your home stay clean.
Wash Attachments Properly
Once the loose hair is gone, it’s time to wash the Dyson head and attachments so they can keep moving freely and pick up dirt the way they should.
Give each piece a close look, then wipe away dust with a damp cloth before any deeper cleaning. For attachment care, use warm water on the removable parts, but don’t soak the motorized head. Instead, scrub grooves with a soft brush or toothbrush, so grime doesn’t hide in tiny corners.
If you spot sticky buildup, a little dish soap on the cloth can help. After that, rinse well and dry every part fully.
Good tool sanitizing keeps odors down and helps your vacuum feel fresh in your hands. Let the pieces air-dry completely before you click them back on.
Reassemble Your Dyson Vacuum
With the parts clean and fully dry, reassembling your Dyson vacuum should feel much easier than the teardown, and a calm, step-by-step approach will keep it that way. Start by fitting the filters back in their slots, then slide the bin into place until it clicks.
Next, align the motor housing so it sits snug and level, and make sure the battery contacts meet cleanly with no debris between them. After that, reattach each tool and head in the same order you removed them, pressing gently so every lock catches.
If a piece resists, stop and realign it rather than forcing it. A careful rebuild helps you feel confident again, and it keeps your machine ready for the next round of cleaning with your usual steady rhythm.
Test Dyson Suction After Cleaning
Now that your Dyson is back together, it’s time to make sure all that cleaning actually paid off. Turn it on and listen for a steady, strong sound.
Then run simple airflow testing by holding the cleaner near a lightweight piece of paper or a small bit of dust. If it lifts quickly, your suction is back in shape.
For better suction diagnostics, check the bin, filters, and wand for any leftover blockages if the pull still feels weak.
You can also test each attachment one by one, since a hidden clog in one tool can slow the whole machine.
If the vacuum hums smoothly and picks up debris with ease, you’ve done it right. That fresh, just-cleaned feeling should come with real power.
Frequently Asked Questions
How Often Should Dyson Filters Be Washed?
Wash your Dyson filters every month to maintain strong suction and keep your vacuum performing reliably.
Can I Use Detergent on Dyson Vacuum Filters?
No. Do not use detergent on Dyson filters; it can damage them. Rinse them with cold water only to preserve performance.
How Do I Remove the Dyson Bin From the Machine?
Press the red bin release located beneath the vacuum, then pull the dust cup straight down. It will detach cleanly so you can empty and rinse it, allow it to dry, and snap it back into place.
Should Dyson Cyclone Parts Be Submerged in Water?
No. Do not submerge Dyson cyclone parts in water because this can cause water damage. For proper care, use a soft brush or compressed air to remove dust. Rinse only areas specified in the user manual and allow all components to dry completely before reassembling.
How Long Do Dyson Filters Need to Dry?
Allow the filters to air dry for a minimum of 24 hours. Place them somewhere with good airflow so they are completely dry before reinstalling.
